


This creamy white chicken chili is dairy-free, bean-free, and ready in about 25 minutes, so it's the recipe you're looking for if you searched for white chicken chili without any dairy in it. Chicken breasts, green chiles, and salsa verde simmer together with warm spices, then a scoop of the chili gets blended smooth and stirred back in for a thick, velvety texture, and no cream, cheese, or beans are required. The result tastes just as rich as the classic version, with tender shredded chicken in every spoonful and a little kick from the green chiles. I make this one on repeat once the weather turns, whether it's a quick Tuesday dinner or a pot I'm keeping warm for game day.

No Dairy, Still Creamy
Most white chicken chili recipes get their creaminess from heavy cream, cream cheese, or blended white beans. This version skips all three. A scoop of the finished chili gets blended smooth and stirred back in, along with a little full-fat coconut cream, and the starch already in the vegetables and chicken helps thicken the rest on its own. One note on which coconut product to grab. Skip the carton kind sold as a dairy-free creamer, since it's too thin to do any work here. Grab a can labeled coconut cream, or the thick, solid layer from a chilled can of full-fat coconut milk, and steer clear of cream of coconut, which is the sweetened kind made for cocktails.
Coconut cream alone makes a chili that's rich but still thin, closer to a brothy soup than a thick, spoon-coating chili. Blending part of it fixes that without watering down the flavor or needing beans, which also keeps this version naturally lower-carb.
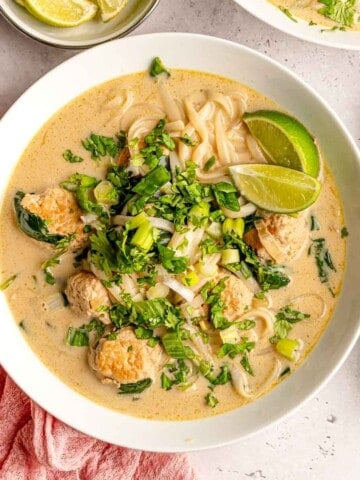
The same idea shows up in a couple of other recipes on the site. Thai Green Curry Meatball Soup uses full-fat coconut milk for the same reason, since lighter versions separate and turn grainy. And Pumpkin and Sweet Potato Soup skips coconut altogether and gets its creaminess from blending the vegetables themselves, proof that dairy-free doesn't have to mean thin. If you've made white chicken chili before and it turned out more like soup than chili, that thinness is almost always a sign that nothing got blended, or that beans were left out without anything to replace their thickening power. This method fixes both at once.
Jump to:
Ingredients and Substitutions

- White beans (optional). This chili is bean-free by design, since the blending method already handles the creaminess and body that beans are usually there to provide. If you like beans anyway, stir in one drained can of cannellini or great northern beans along with the shredded chicken. You'll get a heartier, higher-carb bowl, but you won't need it for texture.
- Chicken breasts. These shred easily and stay lean. Boneless, skinless thighs work too, and they're more forgiving if you overcook them slightly, though they'll add a bit more fat to the broth.
- Salsa verde. This is your flavor and acidity base, doing double duty as a sauce. If you're out, use one extra can of green chiles plus a squeeze of lime, though the chili will taste milder and less tangy without it.
- Canned green chiles. These bring mild, steady heat without overwhelming the dish. Swap in one fresh diced jalapeño (seeds removed for less heat) if you want a fresher, sharper kick, but expect more variation in spice level than the canned version gives you.
- Full-fat coconut cream. This is what replaces dairy for creaminess. See the note above on exactly which product to buy, since this is the one ingredient that can quietly sink the recipe if you grab the wrong thing.
- Chicken broth. This thins the base to a consistency you can control. Vegetable broth works as a swap, though the chili will taste slightly less savory.
- Onion, green pepper, and garlic. These build the aromatic base. Any color bell pepper works, and red or yellow will make the chili taste a touch sweeter.
- Cumin, paprika, and chili powder. These give the chili its warmth without making it spicy. Increase the chili powder if you want more heat, or add a pinch of cayenne.
See the recipe card below for quantities and remaining ingredients.
Instructions

Step 1: Heat olive oil in the Instant Pot by turning on the sauté function. Add the diced onion and green bell pepper and cook until translucent. Turn off the pot. Next, add the chicken thighs to the pot along with minced garlic. Pour in the chicken broth and add in the spices, salsa verde, and green chiles.

Step 2: Close the lid on the Instant Pot, set the vent to seal and pressure cook on high for 20 minutes. Allow the pressure to naturally release for a few minutes then carefully switch the valve to release the remaining pressure.

Step 3: Remove the chicken thighs and shred with two forks. Add the chicken back to the pot along with the coconut cream.

Step 4: Set the Instant Pot to sauté and bring the chili to a slight simmer. Once it starts simmering, hit cancel. Serve with a dollop of sour cream and tortilla strips and enjoy!
⏲️Stovetop White Chicken Chili
- Heat olive oil in a large pot or Dutch Oven over medium heat. Add the diced onion and green pepper and cook for about 5 minutes, stirring frequently.
- Add in the garlic cloves, salt, black pepper and spices.
- Pour in the can of green chiles, jar of salsa and chicken broth. Mix to combine.
- Add the chicken breasts to the pan. Cover the pot, bring to a slow boil, turn the heat down to medium-low and simmer for 20 minutes.
- Remove chicken from the pot and shred with two forks, add it back to the pan and cook for another 10 minutes.
- Stir in the coconut cream and cook for 2 more minutes.

Chef Tips
- Blend part of the chili, not all of it. Scoop out 1 to 2 cups of the broth, chicken, and vegetables and blend it smooth, then stir it back into the pot. This is what turns a brothy soup into a thick, spoon-coating chili. Blend the whole pot instead, and you'll end up with something closer to a puree than a chili, so stick to that 1 to 2 cup range even if you're tempted to blend more for a thicker result.
- Use full-fat coconut cream, and add it after the chicken is cooked. Canned coconut cream, or the solid layer from a chilled can of full-fat coconut milk, is what makes this chili taste rich instead of thin. Stir it in after pressure cooking or simmering, not before, so it stays smooth. Added too early, or swapped for a lighter coconut milk, the sauce can separate or turn watery instead of creamy.

Serving
I like to serve this chili straight from the pot, with bowls and toppings set out so everyone can build their own, like sliced avocado, cilantro, green onion, and crunchy tortilla strips. It's my go-to for weeknights, since picky eaters can customize their bowl without any extra cooking from me. When I want a fresh side, I reach for Quinoa and Black Bean Salad, since its cilantro lime vinaigrette echoes the chili and it's vegan, gluten-free, and dairy-free. In warmer months, I'll make Grilled Corn Salad instead, and I just leave off the feta to keep things dairy-free.
For game day, I put this chili out next to Easy Flank Steak Fajitas, so guests get two dairy-free Tex-Mex mains to pick from.
Storage & Reheating
Fridge: Store leftovers in an airtight container in the refrigerator for up to 4 days.
Freezer: Let the chili cool completely, then freeze it in a freezer-safe container or bag for up to 3 months. Thaw it overnight in the refrigerator before reheating. Coconut cream can separate slightly after freezing, but a good stir while reheating brings it back together.
Reheating: The chili thickens as it sits, so reheat it gently on the stovetop or in the microwave and stir in a splash of chicken broth to loosen it back up. On the stovetop, warm it over medium-low heat, stirring occasionally. In the microwave, heat it covered in 1-minute bursts, stirring between each, until hot throughout.
More Chili & Soup Recipes
- Easy Creamy Chicken and Rice Soup in 30 Minutes35 Minutes
- Slow Cooker Irish Beef Stew6 Hours 30 Minutes
- Thai Green Curry Meatball Soup35 Minutes
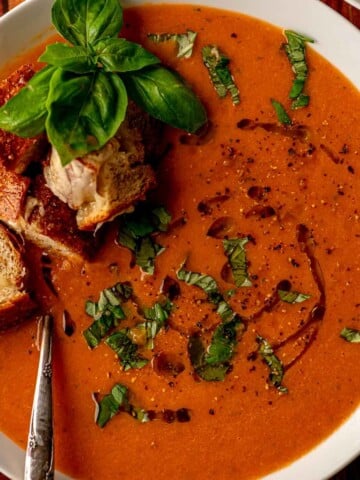
- Roasted Tomato Soup45 Minutes


Did you make this recipe? Leave a ⭐️⭐️⭐️⭐️⭐️ rating and a comment below-I'd love to hear how it turned out! THANK YOU!

Instant Pot White Chicken Chili
Video
Save this Recipe!
See the full post for extra tips and photos
Ingredients
- 1 tablespoon olive oil
- 1 yellow onion, diced
- 1 green pepper, diced
- 2 garlic cloves, minced
- ½-1 teaspoon salt
- ¼ teaspoon black pepper
- ½ teaspoon cumin
- ½ teaspoon paprika
- 1 teaspoon chili powder
- 1 (7 ounce) can green chiles
- 1 (16 ounce) can salsa verde
- 2 cups chicken broth
- 1 pound chicken breasts
- ½ cup unsweetened coconut cream or the hard part on top of a can of coconut milk, I recommend Thai Kitchen or Whole Foods 365 brand
Instructions
- Heat olive oil in the Instant Pot by turning on the sauté function. Add the diced onion and green bell pepper and cook until translucent. Next, add the chicken to the pot along with minced garlic. Pour in the chicken broth and add in the spices, salsa verde, and green chiles.1 tablespoon olive oil, 1 yellow onion, 1 green pepper, 2 garlic cloves, ½-1 teaspoon salt, ¼ teaspoon black pepper, ½ teaspoon cumin, ½ teaspoon paprika, 1 teaspoon chili powder, 1 (7 ounce) can green chiles, 1 (16 ounce) can salsa verde, 1 pound chicken breasts, 2 cups chicken broth
- Close the lid on the Instant Pot, set the vent to seal and pressure cook on high for 20 minutes. Allow the pressure to naturally release for a few minutes then carefully switch the valve to release the remaining pressure.
- Remove the chicken thighs and shred with two forks. Add the chicken back to the pot along with the heavy cream or coconut milk.½ cup unsweetened coconut cream or the hard part on top of a can of coconut milk
- Set the Instant Pot to sauté and bring the soup to a slight simmer. Once the soup starts simmering, hit cancel. Serve with a dollop of sour cream and tortilla strips and enjoy!
Sarah's Tips
- Chicken options: I usually use chicken breasts, but boneless skinless thighs work just as well and stay extra tender.
- Heat level: This chili is mild as written. If you like more heat, add a pinch of cayenne or extra green chiles.
- This chili is bean-free by design. The creaminess comes from blending 1 to 2 cups of the finished chili and stirring it back in, along with the coconut cream, so no beans are needed for texture.
- Use full-fat coconut cream, not the carton kind sold as a dairy-free coffee creamer, since it's too thin to thicken the chili. A chilled can of full-fat coconut milk works too, and you just scoop off the thick, solid layer on top.
- The chili thickens as it sits, especially after a day in the fridge, so loosen it with a splash of broth when reheating.
- Store leftovers in the refrigerator for up to 4 days, or freeze for up to 3 months. Thaw overnight in the fridge before reheating.
Emily H says
First soup recipe I’ve tried and it was So easy and so delicious!! Can’t wait to make it again !!
Sarah Holt says
Hi Emily, thank you for the kind words. I'm so happy you enjoyed it! 🙂